Bolt-Action Pen
Everyday carry pens have become increasingly popular in recent years, and for good reason. They're one of the handiest objects to keep on-hand. As someone who never seems to have a pen handy when I need one, I decided to design my own high-end EDC writing instrument.

The Design
For my pen, I decided to utilize a bolt-action mechanism. Bolt-action pens have all the benefits of other retractable pens, but with far simpler construction. They have fewer moving parts than other mechanisms, making them easy to maintain, and you don't have to worry about losing a cap. Plus, they're really fun to use. I did explore some other, more novel mechanisms, but ultimately decided to stick with something simpler and more reliable.
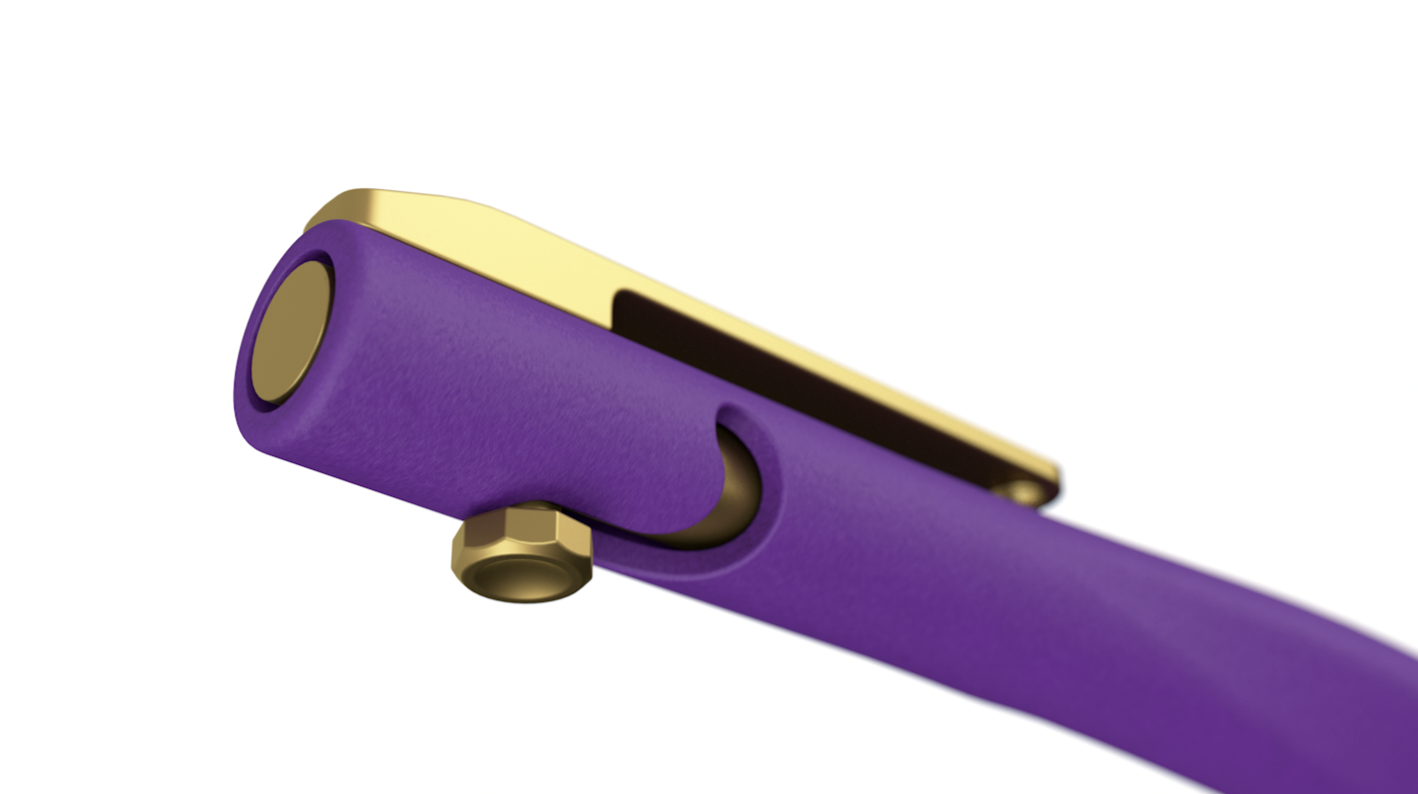
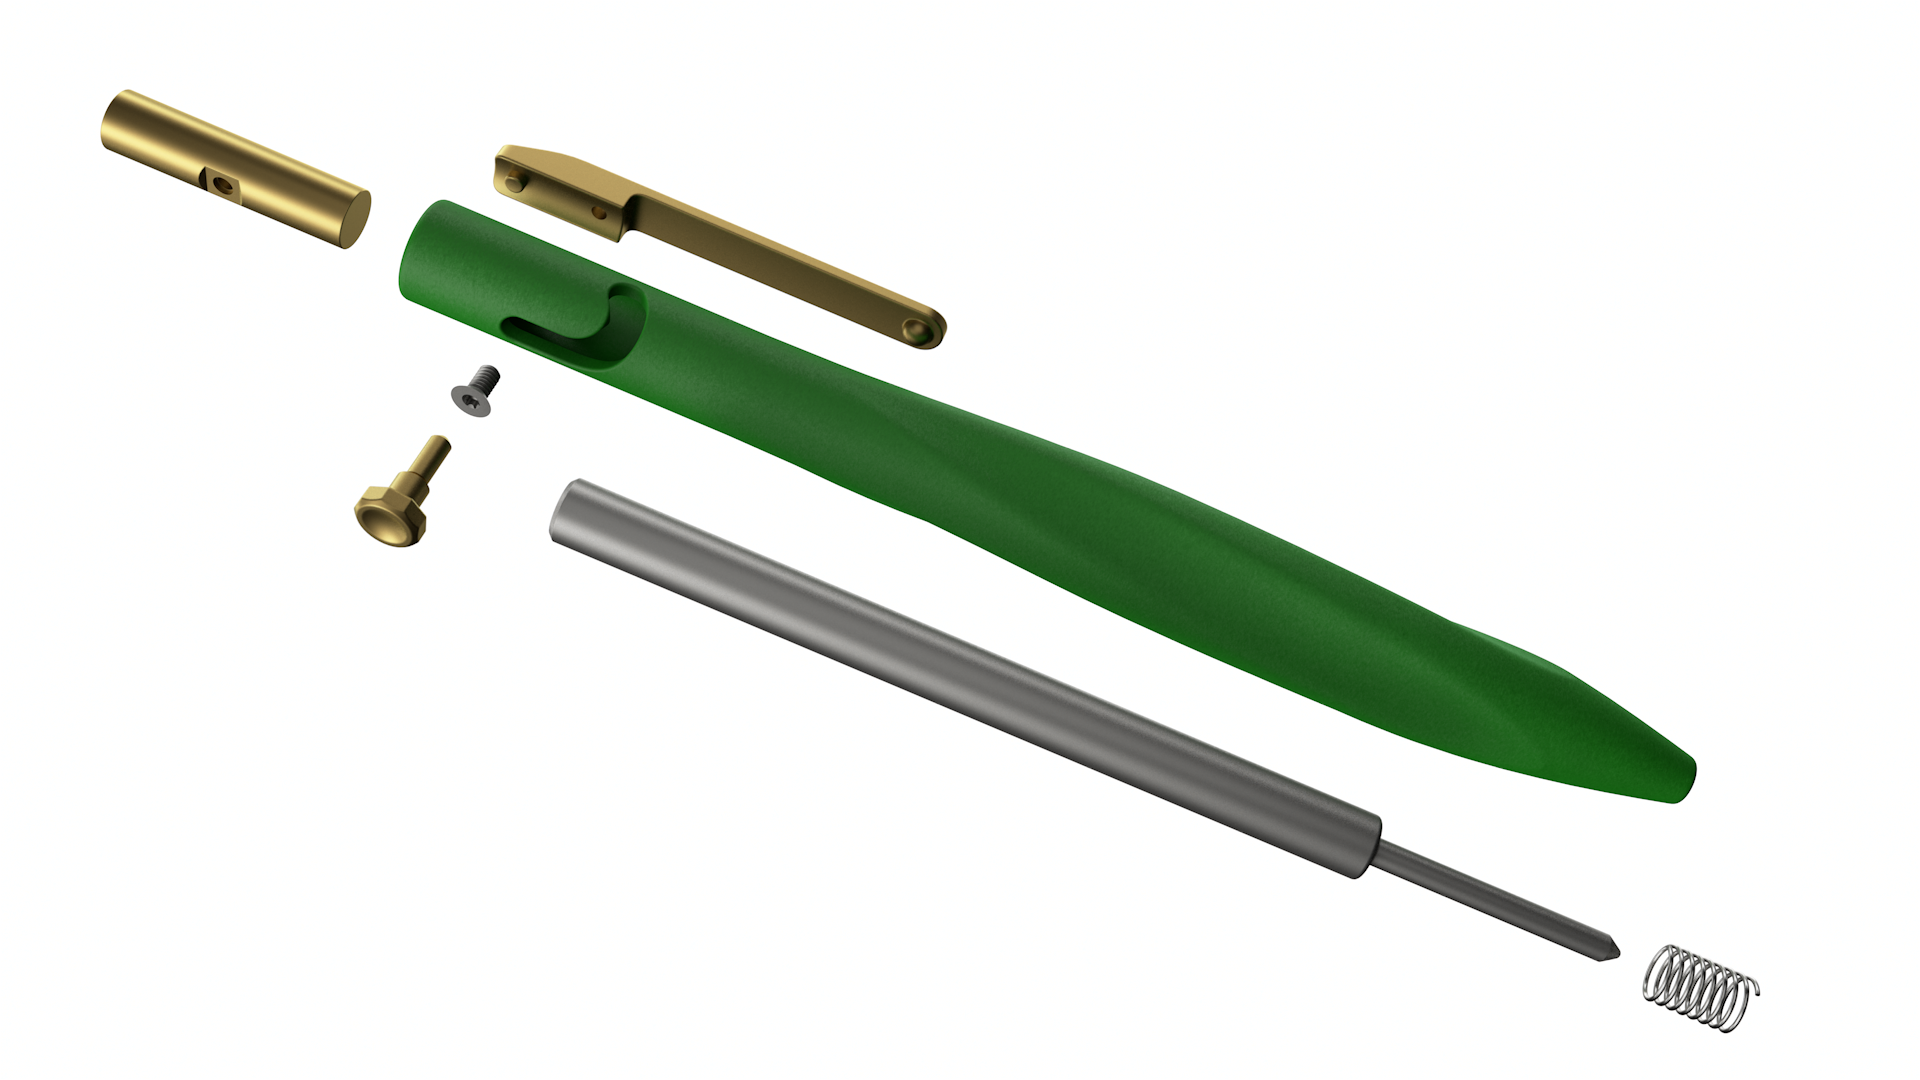
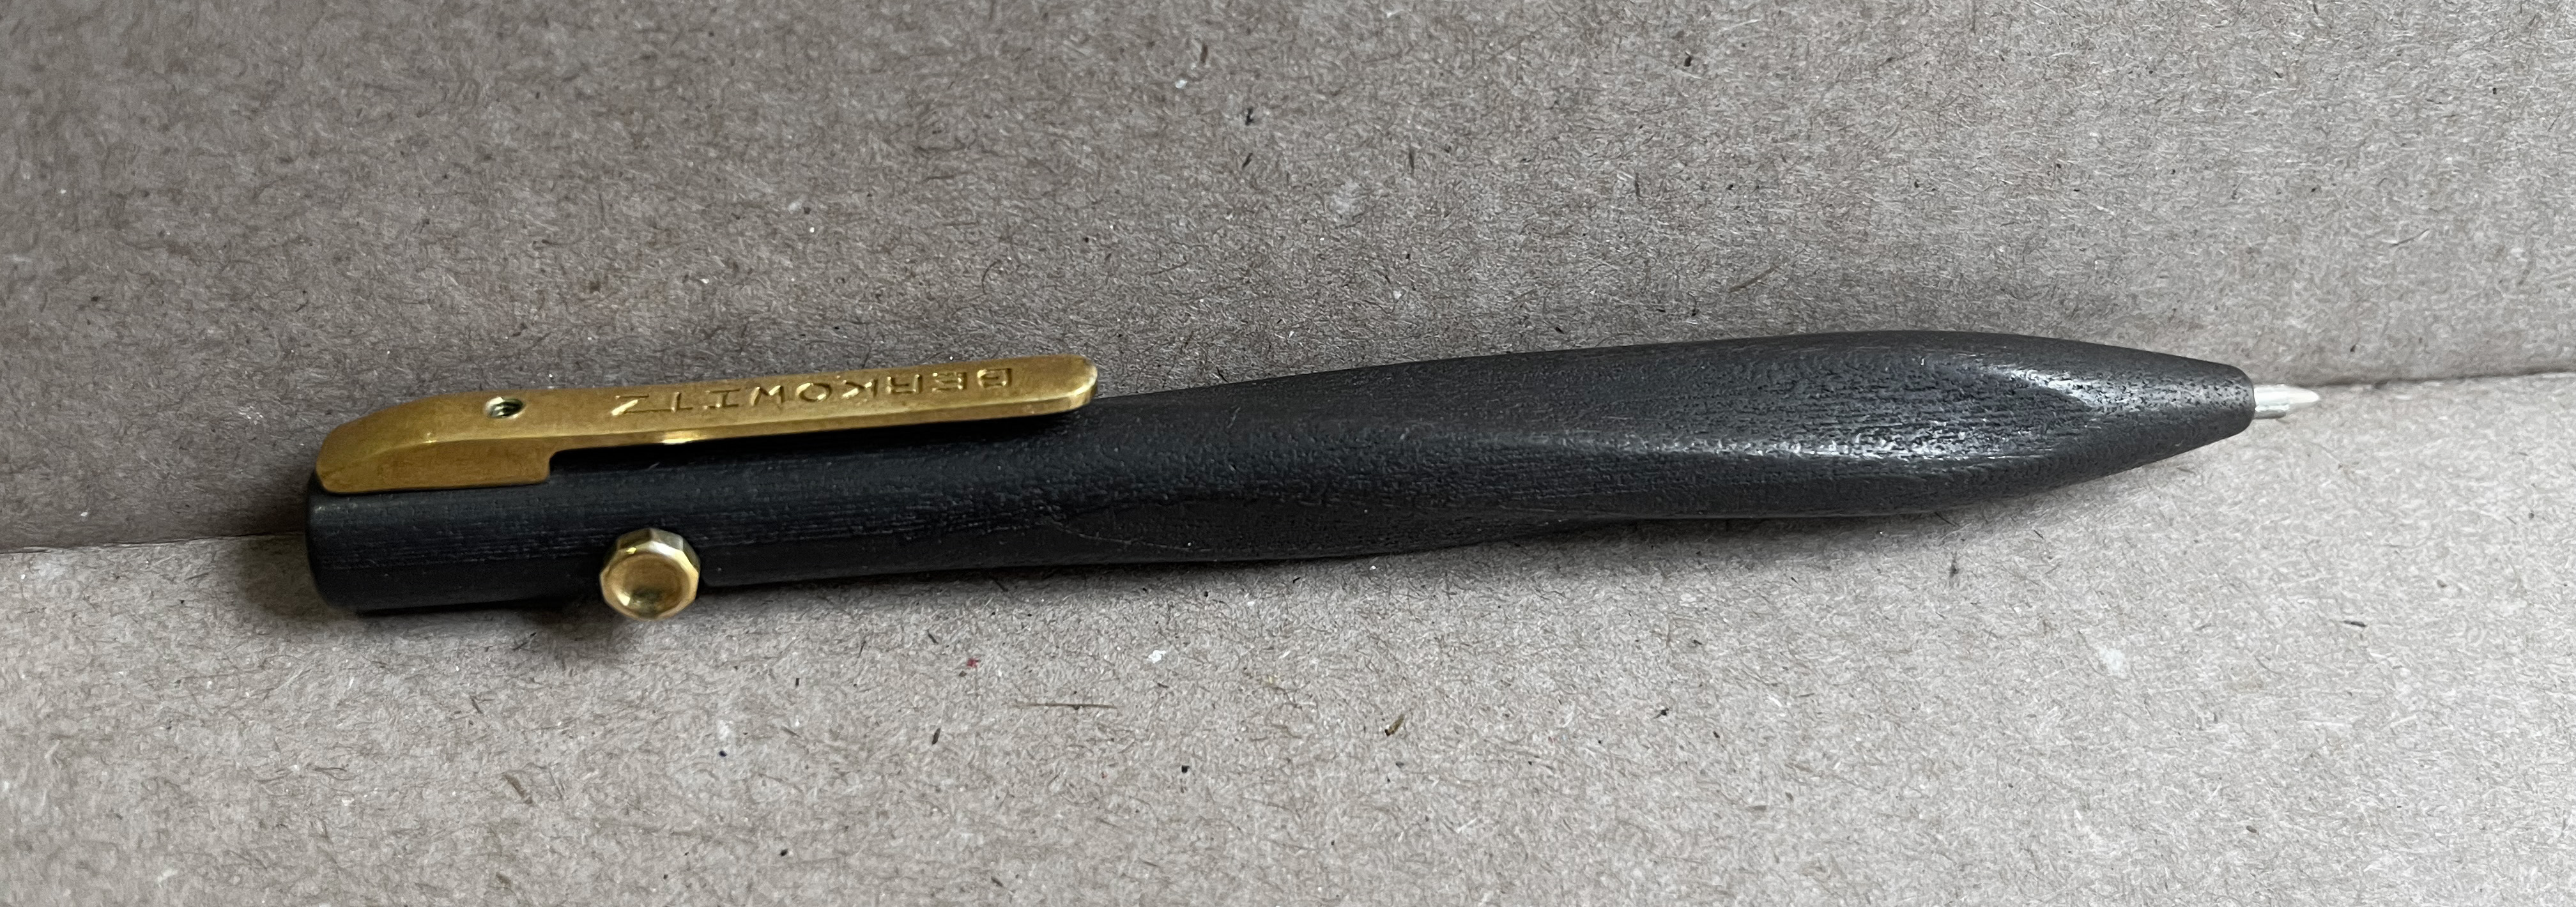
After creating the basic shape of my pen based around the dimensions of my chosen ink cartridge—I chose the Parker Jotter cartridge, as it's a fairly standard format—I was now faced with the task of designing the mechanism. Bolt-action pen mechanisms are generally comprised of three parts: the pen body, a bolt that pushes on the ink cartridge, and the knob that you use to actuate the bolt. While most similar pens hide the bolt within a sealed body, I thought it would be interesting to accentuate it. I accomplished this by removing the usual threaded cap on the top of the body and making the slider flush with the opening. I also made the bolt out of brass to contrast the body, a design element that would later be carried over to the pocket clip and knob.

For the clip, I wanted to maintain the minimal aesthetic by keeping the profile as simple as possible. The outer surface is slightly curved, echoing the curves of the body. But the main feature of the clip is in its construction. Most EDC pens use one of two types of clips:
- A wire clip that is slotted into the body (or between two sections of the body) or a sculpted clip that is screwed on from the outside
- A sculpted clip that is screwed on from the outside
Since I was trying to minimize the number of pieces used, the first option was immediately out. I also prefer the look of sculped clips, and find them less limiting design-wise. The second option seems like the obvious choice for my needs. I even tried a version with that construction (albeit with my own spin on it) but I wasn't happy with how the visible screw heads detracted from the otherwise clean forms. I ended up conceiving of a new retention system. The clip features a post and a threaded hole that align with two holes on the body. One of the holes is countersunk and is in-line with the slot for the knob. This means I can attach the clip using a single screw from the inside, leaving nothing but a small hole (which could be removed entirely if I had been able to tap blind holes) visible from the outside. The result is a clean, nearly uninterrupted strip of metal along the top of the pen. It also means removing the clip leaves only two small holes behind.
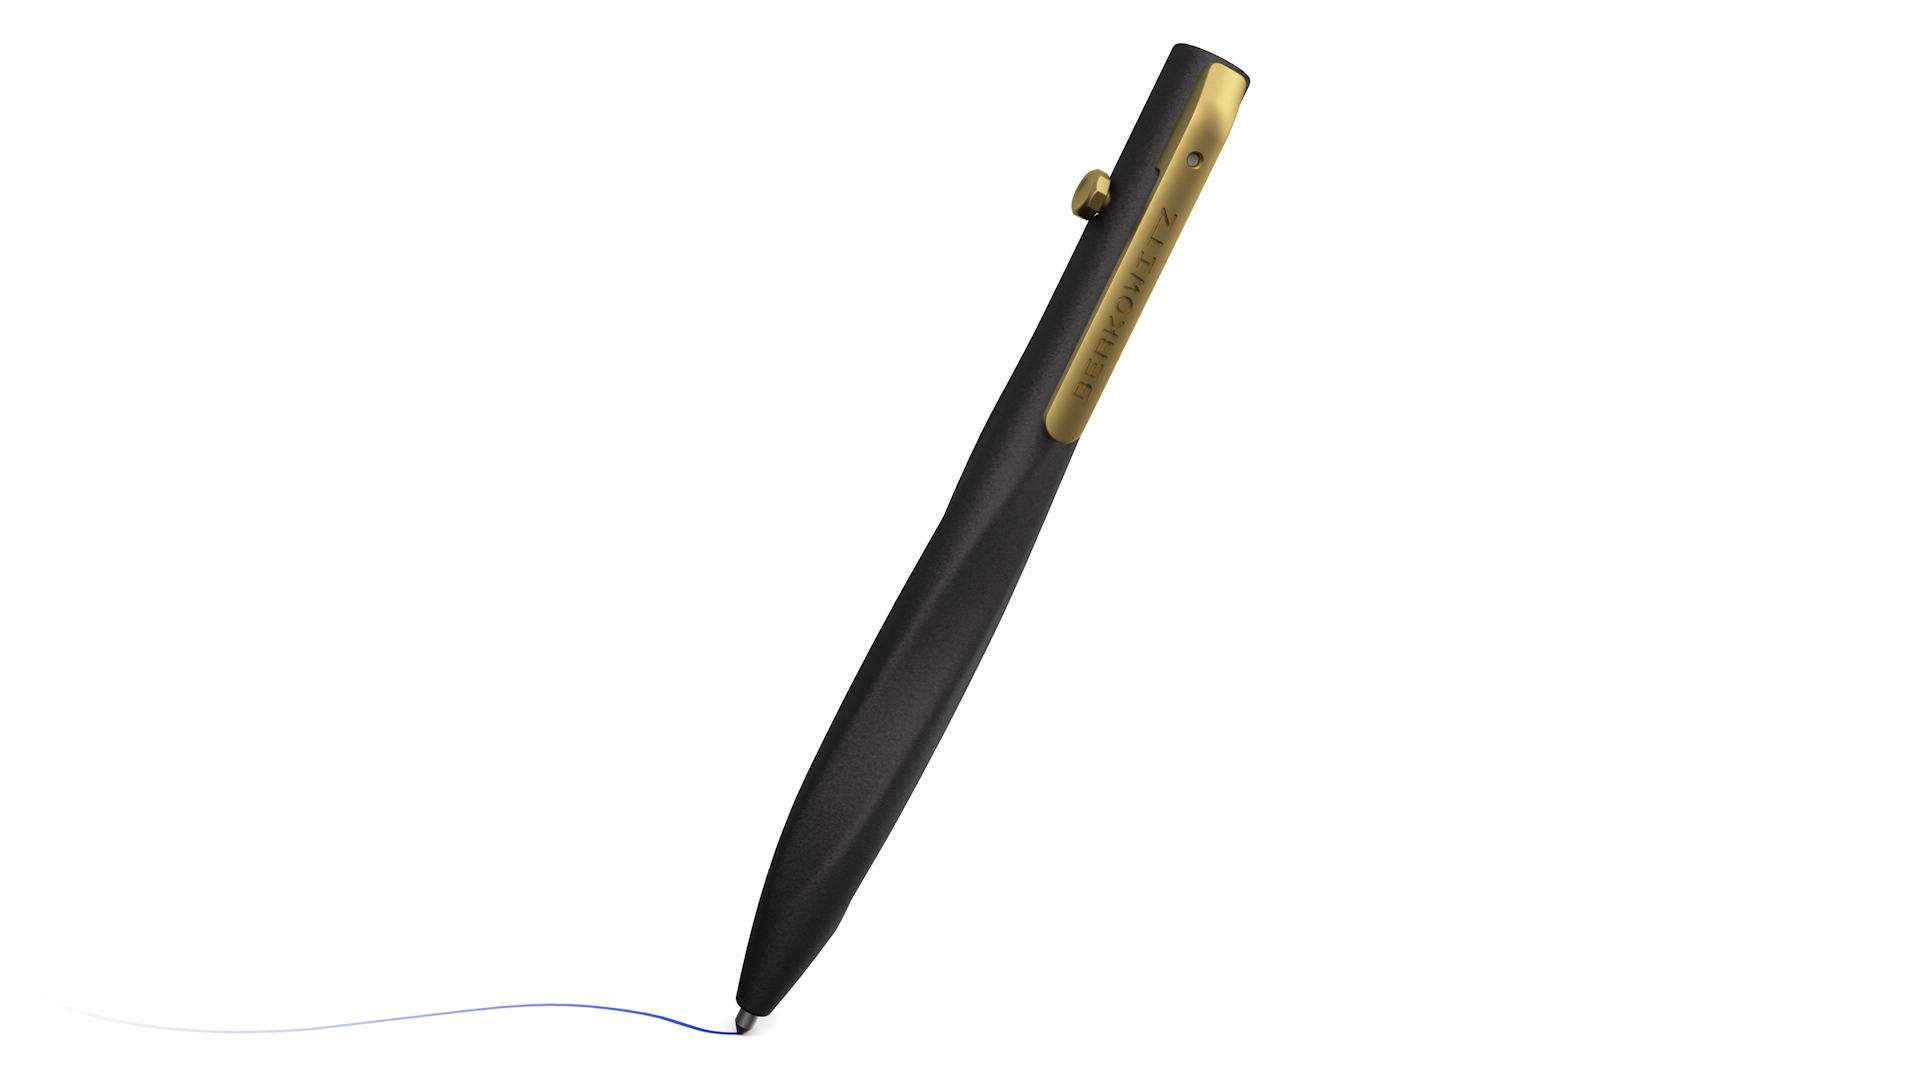
While a simple cylindrical design would be perfectly acceptable—pens tend to be that shape for a reason, after all—I decided a grip would be more comfortable. I added a spiralized bulge to the lower section of the pen that adds some soft curves that better fit the hand. And, despite appearances, it's just as comfortable to hold left-handed as it is right-handed.
Overcoming Challenges
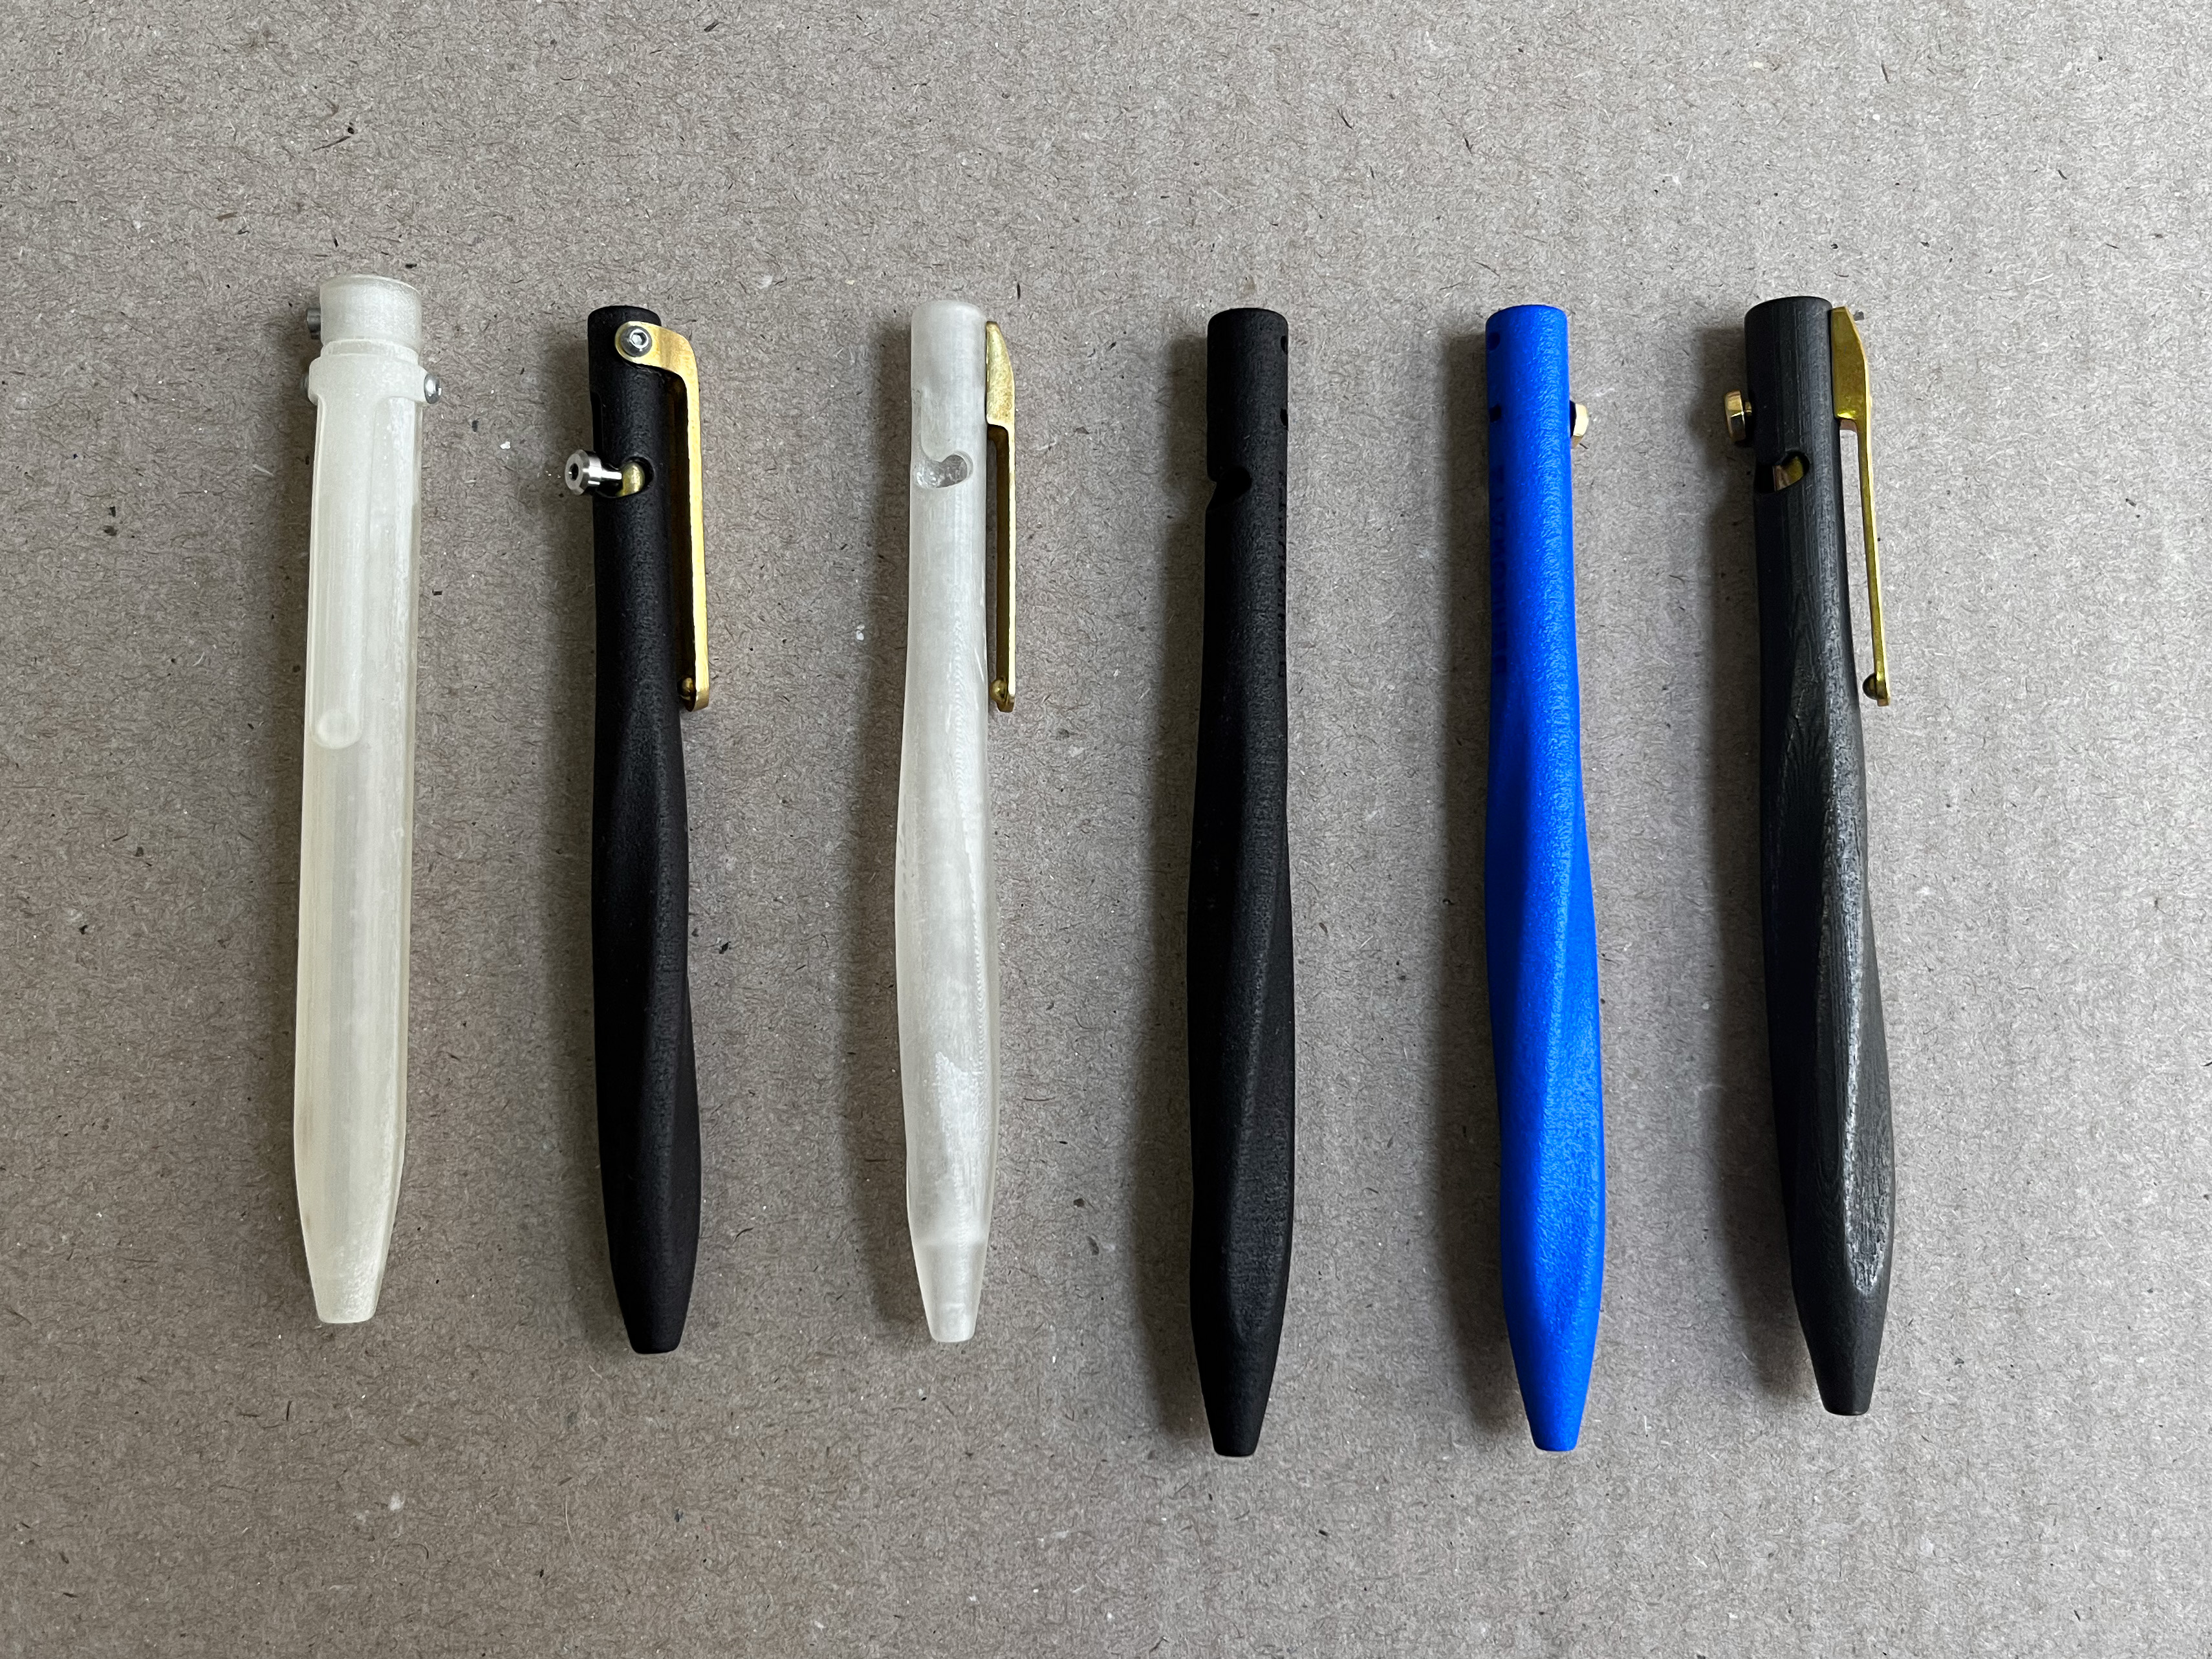
Although my ultimate vision for the pen was to make the body out of steel, most of the prototypes were made of inexpensive nylon plastic. I tried making a version out of clear resin—mostly to explore the unique semitransparency that material offers—but realized the material on the inside of the body would not cure properly, and attempts to clean up the inner surfaces resulted in ugly inconsistencies that were visible from the outside.
Switching to steel also posed some challenges. 3D printed steel is very rough, requiring tumbling and polishing to achieve a smooth surface. This means the areas that cannot be polished, such as the inside of the pen body, retain a rough finish that can affect the smoothness of the action. Additionally, printed steel shrinks during the production process. The first steel pen I ordered was too small to fit the ink cartridge. Ultimately, I was able to adjust my tolerances and, with some heavy post-processing, produce a functional steel pen.
Conclusion
Now that I have both steel and nylon versions of the pen, I can see the different strengths and weaknesses of the materials. Obviously steel is much stronger than nylon, but the nylon is much more sturdy than expected. Steel is also much heavier, which some people would consider a benefit and others a detriment. Personally, I find it hard to choose. The nylon also comes from the printer with a more matte finish, which feels quite nice in-hand. One of the biggest advantages nylon has is color selection. I can easily produce the pen in a wild yellow or a more sophisticated black. Steel, by contrast, offers a more limited color selection, although the available finishes are beautiful.
The latest version in steel lives in my bag, and I can always count on it in a pinch. It's comfortable to write with, and the action remains smooth. In the future it might be interesting to explore other construction methods, such as CNC milling, although cutting the geometry I have designed would likely require a 4-axis mill, which I don't currently have access to. I'd also like to revisit transparent materials so the mechanism is visible. Either way, I'm quite satisfied with where this project has gone and, more importantly, learned a lot working on it.